Now that we have a good pencil shape, we need to start applying some materials. We'll start with the tip. If you don't remember how to assign materials, refer to Lesson 2. If you need help with multiple materials, see Lesson 7. Select all the parts of your pencil and the camera and press Numpad/ to get to the local view.
In Object Mode, select the tip of the pencil. We will our 'BEECH' material for the basis of the the wood part of the pencil, like so:
- Select the Shading and Materials buttons
- In the Links and Pipeline tab, click the drop down button next to the 'Add New' button and select the material 'BEECH'
- Select the Editing button
- In the Link and Materials tab, click the 'New' button to create a copy of the 'BEECH' material. Blender names the new material 'BEECH.001'. Click the 'Assign' button
- Select the Shading and Materials buttons
- In the Texture tab, select the second 'BEECHTEX' texture and click the 'Clear' button to remove it
- Click the remaining 'BEECHTEX' texture
- In the Map Input tab, select the tube button
- Change sizeX, sizeY and sizeZ to 1.00
- In the Shaders tab:
- Spec. = 0
- Hard. = 1
- Set the X,Y,Z mapping as follows (this rotates the texture 90 degrees):


Press F12 and render to check the material:

- Spec. = .8
- Hard. = 115
Now in the Material tab, change the Col to black (000000). Render to see the result:
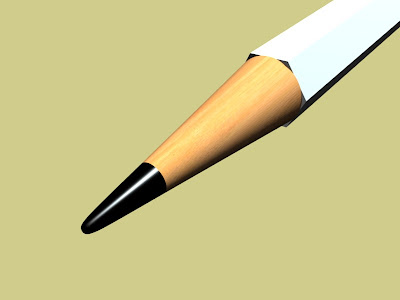 Oh man, that's some big lead! Here's how to fix it. Cut another edge loop in the wood part and while it's still pink, slide it toward the tip. You'll see the lead getting shorter:
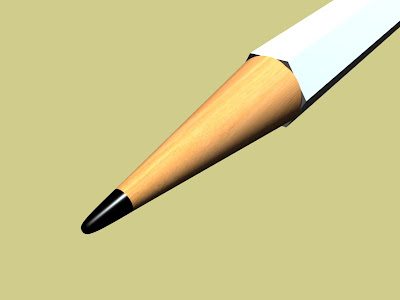
 Render again. Oh yeah, that's more like it!
 Now let's move to the ferrule. Tab into Object mode and select the ferrule. Select the Shading and Materials buttons and click the 'Add New' button. Name the new material 'SILVER'. In the Material tab, change the Col to white (FFFFFF). Go to the Shaders tab and change the following settings:
 Oh man, that's some big lead! Here's how to fix it. Cut another edge loop in the wood part and while it's still pink, slide it toward the tip. You'll see the lead getting shorter:
 Render again. Oh yeah, that's more like it!
 Now let's move to the ferrule. Tab into Object mode and select the ferrule. Select the Shading and Materials buttons and click the 'Add New' button. Name the new material 'SILVER'. In the Material tab, change the Col to white (FFFFFF). Go to the Shaders tab and change the following settings:
- Ref. (Reflectance) = .31
- Spec. = .5
- Hard. = 25
Now on the Mirror Trans tab, change the following settings:
- Select the 'Ray Mirror' button
- RayMir. = .85
- Fac. = 1.31
- Aniso = .496
Render to check the look:


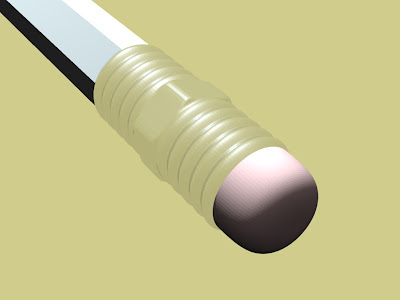
Now select the eraser and create a new material called 'ERASER'. In the Material tab, change the Col to a nice pink (FCD0D0). Now go to the Shaders tab and change the following:
- Ref. = .79
- Spec. = 0
- Hard. = 511
Do a check render (I switched back to local view to save render time):
 Now for the shaft material. Select the shaft and create a new material called 'YELLOW'. Set the color (Col) to FF9F34. We need a little texture here. I used a cork image for the texture. Here it is...
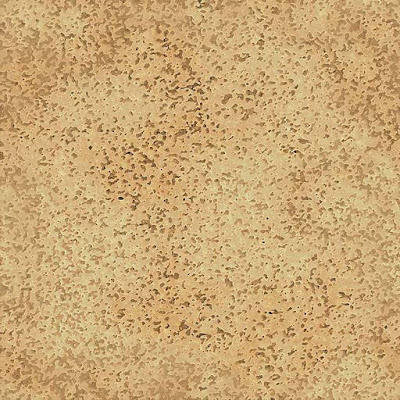 In the Texture tab, add a new texture and name it 'DENTS'. Select the Texture button and select 'Image' as the Texture Type. Load the cork image you downloaded. Select the Material button and go to the Map Input tab. Change the following settings:
- Select the 'Sphe' (Spherical) button
- Set sizeX, sizeY, and sizeZ to .20
Now in the Map To tab, change the following settings:
- Deselect the Col button
- Select the Nor button
- Set the Normal slider to .75
Now render out the scene. Looks good!
 All Together Now
 All Together Now
Now that we have all of the materials applied to the various parts, let's join the pencil into one object. Select all the parts and choose Objects>Join Objects (or Ctrl 'j') and join them all together. In order for the pencil shaft to remain hexagonal, we need to select the faces of the shaft and crease the subsurf (Shift + 'e' and drag the mouse). Now our pencil is one object. In our next lesson we use Blender physics to set the pencil on the desktop!


No comments:
Post a Comment