A Desktop Nescessity - The Cup
To ensure that the cup is on the desktop plane, select the plane in Object Mode and press Shift+'s' and select 'Cursor to Selection'. This places the cursor in the center of the desktop plane. Start the cup by making a circle with 16 vertices. In Object Mode, Press Numpad7 (top view) and Add>Circle. Set the Vertices to 16 and the Radius to 12. This is the base of the cup. Numpad1 to the front view and Tab to go into Edit mode. All the vertices of your circle should be selected. Select Mesh>Transform Properties from the menu to show the Transform Properties window. Press 'e' for extrude and select Edges Only from the pop-ip menu. Click the center mouse wheel to allow for orthagonal extrusion and extrude until the Median Z in the Transform Properties reads 2.00. We now have our basic cup shape!
TIP:The highlighted vertices in the image below form what is called an Edge Loop. They are a loop of vertices that define an edge in Blender. If for some reason you deselect the vertices (and consequentially the edge loop) you can re-select the entire edge loop by pressing Shift + Alt and selecting one of the vertices, which will in turn select the entire edge loop. This saves a lot of time trying to reselect vertices!

Leaving the top vertices selected, press 'e' and then 's'. This allows us scale an extrusion that gives width to the rim of the cup. Your cup should look someting like this...

Now, once again leaving the vertices selected, press Numpad1 to switch to the front view. Press 'e' once again to extrude the inside surface of the cup downward so it looks like this...

We will save render time by not closing the inside bottom of the cup since we never see it. If you think out how a scene will be viewed, you can save a lot of time by not modeling things that aren't seen by the camera. We do, however, need to close the base of the cup. Press 'a' to deselect all vertices and select the edge loop that forms the original circle as described in the tip above (you read that, right?). Press 'e' and then 's' once again to make a scaled extrusion at the bottm edge of the cup os it looks like this...
Next, with the newest edge loop selected, press 'e' and then 's' once again and scale the loop in a little bit. Now press Alt + 'm' and select "At Center" from the pop-up menu. This will fill in the bottom of the cup with pie shaped faces, like so...

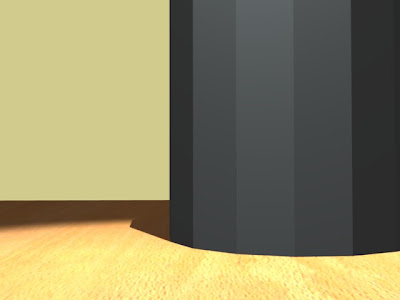
If we render our scene at this point, it looks none-to-impressive, but we'll fix that in the next post. Press F12 and you should get something that looks like this:


No comments:
Post a Comment