Showing posts with label Modeling. Show all posts

Lesson 12: Path Extrusion: A Paperclip

Throwing You a Curve

It may look like the paperclips are the hardest objects to model in the image. It's not true! They are actually very easy to model. We do it with a path extrusion. Start with your scene in top view(Numpad7) and toggle to global view (Numpad/).

In Object mode, add a path (Add>Curve>Path). Tab into Edit Mode. Here is your path:
Select the vertice on the far right and press 'e' to extrude. While pressing the Ctrl key, extrude the path half way between the major grid lines:
Extrude the path again and then again to round the bend:
Keep extruding until you got the rough shape you are looking for:
Now pull a few vertices around to get a more refined shape:
Now tab into Object Mode and drag your curve close to your pencil. Scale it to a realistic size:
Tab back into edit mode, select the vertice shown below, and Shift + 's' and Cursor to selection:
Down to the Wire

Tab back into Object Mode and add a Bezier circle at the cursor (Add>Curve>Bezier Circle). This circle will represent the size of the wire on your paperclip, so scale it appropriately:
With the circle still selected, select the Editing button. In the Link and Materials tab, in the box labeled 'OB:', change the objectname to 'CLIPMESH'. Now select the curve. In the Curve and Surface tab, in the box marked 'BevOb:', enter 'CLIPMESH'. Here's what should happen:
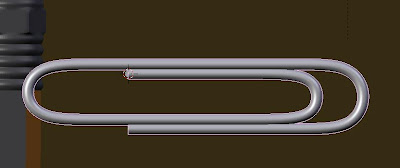
Hmmm... my wire looks a little thick. Easily fixed, though. I just re-select the Bezier circle and scale it:

Now that looks like a paperclip! All I have to do is add material. With the paperclip selected, select the Shading and Material buttons. In the Links and Pipeline tab, select 'SILVER' as the material. Done! Check out the render:

Lesson 11: Advanced Editing - Finishing the Pencil

Finishing Touches

Let's make the pencil model look a little more realistic. In Object Mode, select the pencil and Numpad/ to switch into local view. Tab into edit mode and select the end edgeloop at the tip end of the shaft:
Extrude it about 1/2 the distance of the wood tip, like so:
Select the top face and select the Editing button. In the Link and Materials tab, use the material spinner and select the material to 'YELLOW'. Click the assign button:

Press 'a' and then select the newest edge loop (Shift + Alt + select). Scale the new edge loop down:
Press 'a' to deselect all and select the edge loop forming the wooden tip near where it joins the shaft. Scale it down slightly so it looks like this:
Numpad3 to the side view and select and select the faces of the new cone. The easiest method is to go into face select mode and press 'b' twice to select the faces. Press Shift + 'e' and crease the subsurf to sharpen the edges.
Now I want to sharpen up the tip a little bit. Select the center vertice of the tip and pull it out a little:
Now we will add a little inconstancy to the way our sharpener made the point. Select the two vertices shown and drag them toward the tip:
Go around the tip and randomly pull pairs of vertices forward or back. Do a test render:

Lesson 7: More Modeling and Editing: The Pencil

Sharpening Your Modeling Skills

We have finished our desktop and our cup. Our next object is the pencil. We will model and texture our pencil in four parts and then join them into one.

Getting the Shaft

Let's start with the shaft of the pencil. Numpad1 to the front view and left-click to place the cursor just above the desktop surface. Press the spacebar and select Add>Mesh>Circle. Set the number of vertices to 6. You can leave the scaling at 1. This will place a hexagon at the cursor. You may need to go to the side view (Numpad3) and rotate the circle 90 degrees. Form the front view (Numpad1) it should look like this:
Now go to the side view (Numpad3) and tab into Edit Mode. Press 'e' and select Only Edges and extrude the shaft out to the length you want your pencil. Here's what you should be seeing:
To Err Is Human - So We Need an Eraser

Now let's make the eraser ferrule. Leave the selected edge loop selected and press Shift + 'd' and then the escape key. We just mad a copy of the edge loop. Now press 'p' and choose Selected to separate the duplicated edge loop from the shaft. Tab to enter Object mode and select the duplicated circle and then tab back into Edit Mode. Press 'e' and select Edges Only to extrude the eraser ferrule. Here's how it looks:
Subsurf the ferrule with the following settings:
  1. Levels = 4
  2. Render Levels = 4
Now it should look like this:
Now press 'a' to select all vertices. Press Shift + 's' and select Cursor to Selection. Change the Rotation/Scaling Pivot to 3D mode:

Press 's' to scale the ferrule and scale it up so it covers the end of the pencil shaft:
Now we'll cut some edge loops. Press Ctrl + 'r' and place the pink loop at the center of the ferrule. Now roll the center mouse wheel up to produce multiple evenly spaced edge loops. Create quite a few. Once you've got as many as you want, click the left mouse button to set the edge loops:
Now we need to erase a few of these edge loops. Press 'a' to deselect all the vertices. Numpad3 to the side view. Use Shift + Alt and select the center edge loop. Press 'x' and select Edge Loop. Delete several from the center:

Now select the intermediate edge loops as described above:
Press 's' for scale and 'z' to scale along the z axis. scale it slightly. Pay attention to the scale size in the lower left corner of the screen. when you get the bumps close to the size you want it (say the Scale X reads 1.159) enter a round number using the number pad (for instance, 1.15). Now press 's' again and 'x' to scale along the x axis. Enter the same number you did for the z axis and press enter:

Now we are going to crease the subsurfing. Creasing allows us to make edges sharp within a subsurfed object. Deselect everything and select the low edge loops and press Shift + 'e' to and drag the mouse to crease the subsurf. Once you get it the way you want it, click the left mouse button:
Now to make the eraser itself. First we need to switch back to the Median Point Rotation/Scaling pivot:
As we did with the ferrule, duplicate the last edge loop, separate it and select it in Object Mode (see above if you've forgotten how). Tab into Edit Mode and Press 'e' and extrude it out. Now press 'e' one more time and make a very short extrusion. Scale this edge loop down:

Press 'e' one more time and then the escape key. Press Alt + 'm' and select At Center from the menu. We have an eraser!
Getting to the Point

Now that we have the shaft and the eraser, all we have left to do is the point. We'll start that the same way we did the ferrule - by duplicating and separating the edge loop at the point end of the shaft. Extrude it out:
Scale it down, but do not close it yet:
Extrude the tip a slight bit and then Alt + 'm' to collapse the vertices at the center:
Now for the graphite. Cut a single edge loop near the tip:
Now subsurf the tip:
  1. Levels = 4
  2. Render Levels= 4
Select the original edge loop again and Shift + 's' to move the Cursor to Selection. Change the Rotation/Scaling pivot back to 3D mode and scale the tip up to match the size of the shaft:
Readjust the camera and render it out. It's a pencil!

Lesson 4: Advanced Editing - The Handle

Getting a Handle on Things
TIP:

To make working on single object easier and faster, we can view it by itself locally without having to see all our other objects. To do this, tab to Object Mode and select the object (in our case, the cup) and from the View menu select Local View (or simply press Numpad/). This can save a lot of redraw time, particularly in a scene with many objects.

Now that we have our basic cup shape, we need to add a handle. To do this, we start by cutting a few edge loops. Don't get scared, it's easy. To cut and edge loop, press Ctrl + 'r' and a pink loop will appear in the center of the face(s) you are cutting. In our case we want to make sure we are cutting the loops in the cylinder that represents that outer wall of the cup. Drag the pink loop to where you want it and click the left mouse button to drop it there. We need to cut four edge loops from which we can extrude our handle. Try and make your cup model look like this (I have highlighted the edge loops I just cut for clarity):


TIP:

If you make a mistake and need to delete an edge loop (or decide later that it's not needed) simply select the edge loop (Shift + Alt and select) and press 'x' (delete). Select "Edge Loop" from the pop-up menu.

To make the extrusion of the handle easier, we will rotate our cup slightly to align it with the standard front view. Numpad7 to get to the top view and press 'a' to select all vertices. Press 'r' to rotate and carefully rotate the cup until the four edges on the quadrants line up with the grid lines. From the top, it looks like this:


Now Numpad1 to the front view and press 'a' to de-select all vertices. At the bottom of the editing window, select the 'Occlude background geometry' button and the 'Face select mode' button:
Now select the two closest faces formed by your recently cut edges so we can extrude them...


Switch to the side view (Numpad3) and press 'e' to extrude. Start with a slight extrusion to begin the handle...


Now we need to change back to vertice edit mode. Clear the 'Occlude background geometry' button and select the 'Vertex select mode' button:
Now press 'a' to deselect all vertices and ' b' to window select the two visible vertices on the top handle 'nub' you just made. Press 'g' and drag them up slightly then 'r' and rotate them so they look something like this:


Do the same for the bottom two visible vertices. Keep extruding, dragging and rotating until the handle is nearly complete. Here it is...


Delete the two faces at the ends of your extrusion. The best way to do this is the rotate the view until you can see the faces, click the 'Face edit mode' button, select the faces and press delete. Select Faces from the pop-up menu. Now switch to 'Edge select mode'. Select two edges that you want to join and press 'f' to make a face between them...


Do the same for all four faces to complete the handle...


To add some weight to the places where the handle meets the cup, grab the vertices that form the inside of the handle (Top and bottom) and drag them up and down so your handle looks like this:


Press Numpad/ to switch to global view and Numpad7 to go to top view. Now move and rotate your cup on the desktop so it is in approximately in this position, partially in the light and partially out:


In our next lesson, we will make the cup smooth and apply materials to it. Press Numpad/ to return to global view and press F12 to render. Here is what our scene should look like: